Learn how to manage the SpamExperts service from your SiteTools
This tutorial covers the following topics:
SolarWinds Spam Experts is a leader in the e-mail security market. In order to provide the most secure services to the customers, SiteGround has integrated the SolarWinds Spam Experts solutions on our shared and cloud servers.
In this way, the incoming and outgoing e-mail messages are filtered and the delivery of spam is prevented.
One of the great benefits of the SolarWinds Spam Experts solution is that the system cluster can be taught. All the suspicious e-mails are stored in a Spam Quarantine queue and the clients can mark chosen messages as legitimate.
The SolarWinds Spam Experts control panel can be opened from Site Tools>Email>Spam Protection>Login.

Once the page loads, the domains associated with the account are listed.

Click on the Login link next to the chosen domain to open the The SolarWinds Spam Experts control panel.

Incoming section
Log search

With this tool, you can search the logs for a specific incoming e-mail message based on different criteria like the name, the host and the IP of the sender, the name of the recipient, a chosen data range and more. The deprecated log search page, which includes a “latest results” method, may still be used.
Spam Quarantine

In the Spam quarantine tool, all the suspicious messages associated with the current domain are stored. It contains the messages that are permanently blocked by the anti-spam system. The messages can be deleted or released. If they are released they will appear in the recipient’s mailbox. The cluster will be trained automatically which messages are legitimate and will release similar ones in the future.
The suspicious messages that are temporary rejected are not included in the quarantine system. Their delivery will be automatically retried by the sending servers.
Incoming delivery queue

Here you can find a list with the messages in the delivery queue associated with the corresponding e-mail accounts. You can see the reason for the messages to stay in the queue and can try to manually force their delivery.
Domain aliases

Configuring a domain alias means that mail received for recipients at the alias domain will be treated in the same way as if they had arrived at the primary domain. For example, if you have the domain example.com, and an alias example.org, then mail to recipient@example.org will use the settings for recipient@example.com, spam will be placed in the recipient@example.com quarantine, and log entries will be available under the recipient@example.com address.
Domain statistics

Here you can view the incoming statistics for a given timeframe.
Filter settings

Here you can control the activation of the quarantine system. If you disable the quarantine system, emails detected as spam will not be kept in the quarantine system but will be delivered to your email server. Also, you can set the subject notation that is added to the subject of emails classified as unsure by the filtering system.
Train spam

In this tool you can upload a spam message to train the spamfilter. Currently only .eml and .msg format are supported.
Train not spam

In this tool you can report emails that are "not spam" to the filtering systems. Currently only .eml and .msg format are supported.
Clear callout cache

The information regarding the existing and non-existing recipient e-mail addresses is stored in the callout cache for up to two hours. It can be manually cleared through this web interface. Use this tool if you have recently created an email account and it is not receiving any emails.
Protection report
Protection report – send now

With this tool, you can generate a protection report for a specified date range, and send it to the specified email address. This form will trigger the creation of the report; the actual delivery may take several minutes, depending on the size of the report.
Protection report – domain

With this tool, you can control the activation of the protection report, the recipient, the frequency, the language and the format in which the report is presented to you.
Protection report – mailbox

In this tool, you can find a list of all report recipients. You may add a new recipient here and edit or delete existing recipients
Domain report actions

Select the actions that you wish to be available in your Protection Report. The choices here will apply to your domain level report and also to any email user reports that do not have custom settings.
Email Restrictions
Attachment restrictions
 In this tool, you can specify which emails should be blocked based on the extension of the files attached or the contents of the attachments.
Email size restriction

In this tool, you can set the maximum size for incoming and outgoing emails to be accepted by the filtering system.
Whitelist/Blacklist
Sender whitelist
In this tool, you have the option to add and remove whitelisted senders. The home page of the menu presents an easy-to-use search bar which you may use to find the sender whitelist rules you have already added and remove them if necessary. To add a new rule – just click on the Add whitelist sender link right above the search bar.

This will open up a pop-up window which you should fill in with the domain and the email account you want to whitelist:

To whitelist all accounts on a certain domain, simply add the domain (or email address) of the sender you wish to whitelist in the Address field, and leave the Local-Part empty.
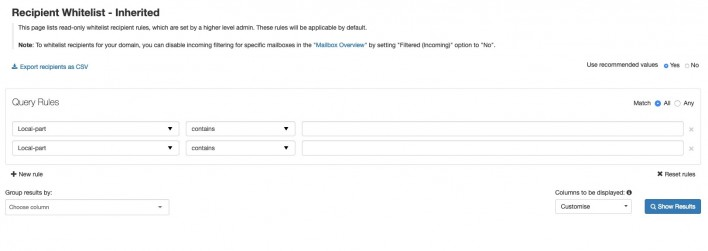
Recipient whitelist
To whitelist recipients for your domain, you can disable incoming filtering for specific mailboxes in the “Mailbox Overview” by setting “Filtered (Incoming)” option to “No”.
Sender blacklist
In this tool you have the option to add and remove blacklisted senders by clicking on the Add blacklist sender link above the search field:

To blacklist a full domain, simply add the domain name in the Address bar and leave the Local-part empty. To blacklist an entire TLD use "*" as a wildcard (e.g. for anything from .nl add "*.nl", without the quotes).

Blacklist recipient
In this tool you have the option to add and delete blacklisted recipients. Email directed to blacklisted recipients will be blocked. Just click on the Add blacklisted recipient link to add new records:
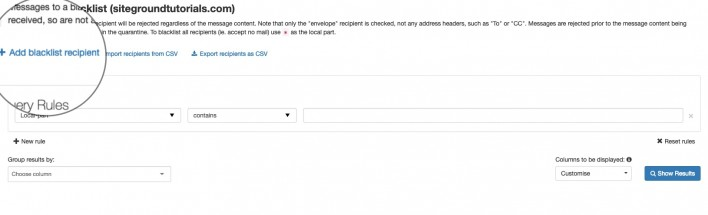
You will be presented with a pop-up in which you should add the Local-part of the recipient. E.g. - if you want to blacklist the webmaster@yourdomain.com recipient, you need to type in the webmaster part in the Local-part field.
